Updated: line goal, arc goal, and rotating hand goal
Added: dynamic location for widgets (WIP, more coming)
Added: line segment, arc segment, image layer
Changed: top menu bar
Fixed: bugs
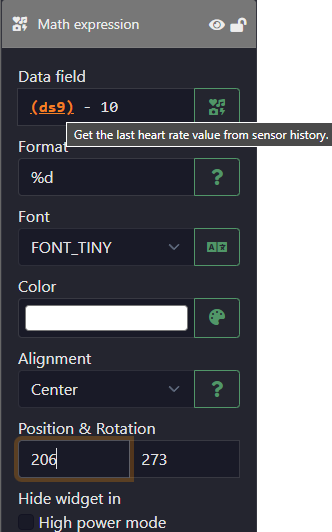
When you want to add a goal field, first, select the shape from goal menu, then you can select a preset (like steps, battery, floor, etc.), it will update the necessary data fields for value, min, and max fields.
Dynamic objects
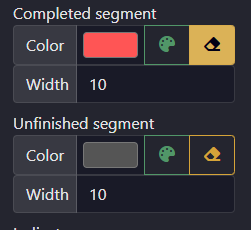
Line: you can set the line’s color, length, width, angle, and position, based on the value from watch’s datafield, or a static value. The line will not be merged to background with other static objects. So you can set the layer’s order to make it visible on top of another object.
Arc/Circle: you can control radius, line width, stroke color, fill color, angles, and position, based on a value from watch’s datafield, or a static value.
Image: you can control image’s position, based on the value from watch’s datafield. Use this one to replace layer mask image. This should save a little bit of watch’s memory.
Static objects: basic shape, text, image, and other shapes are moved here
To add your own group field, you can first create a series of images in your favorite image editor, then add a custom group field (under datafield->icons->custom group field), set the data field, click “Edit”, and add the serials of images for each possible values of that data field.
When your device enters into AOD mode, the watch face will be dimmed. You will still need to follow the rule #1, but instead, the percentage increases to 20%.
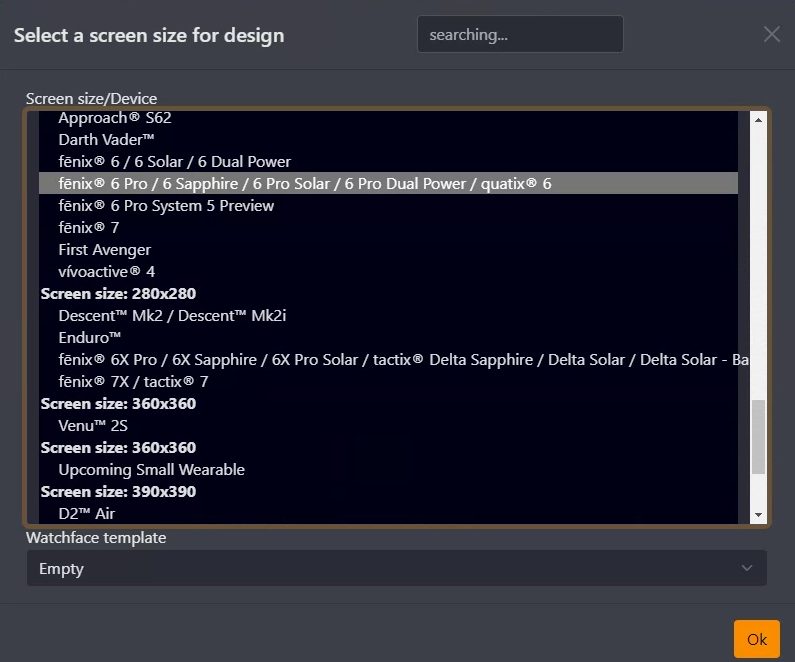
Added: Design for a screen size, not for just one specify device
To-do: DND mode (not working yet)
Fixed: goal field indicator
Fixed: bunch bugs
Screen size
Your design is starting from picking device’s screen size now.
Your design should work for all devices with the same screen size.
Widget section
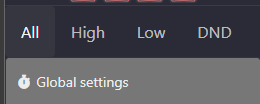
On the left side widgets section, the first row is the power mode selector, click one of them will toggle the visibility of widgets in canvas:
All: canvas will show all widgets in your design
High: canvas will show all widgets which are only visible in high power mode
Low or AOD: canvas will show all widgets which are only visible in low power mode. (When your device has always-on function, it will be AOD, otherwise it will be Low)
DND: (not working yet)
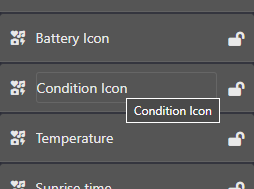
The name of widget can be changed by clicking the text on the widget’s header section:
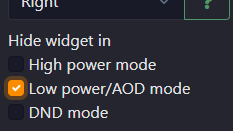
Each widget has three visibility controls:
If you want to hide the widget in certain power mode, check the checkbox.
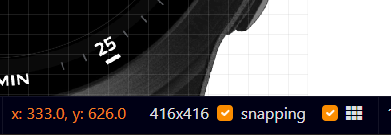
When a widget is selected, the name of the widget, as well as the size will be displayed in the status bar
If you uncheck “snapping” on the status bar, when moving a widget, it will not auto-align with other widgets. The string in front of “snapping” is the screen size for your design.
There are more changes. If you have any issue, please post it on the reddit forum.
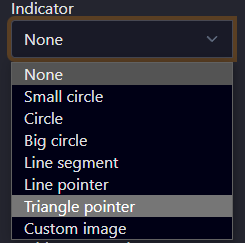
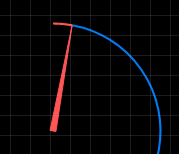
For pointer goal field, you can drag the rotating control pointer to set the starting angle.
For all above three goal fields, you can specify three data fields: one for the “from” value, one for the “to” value, and one for the “current” value.
For example, you can select:
“from” value as a fixed number “0”
“to” value as the “Step Goal” datafield
“current” value as the “Step” datafield
Then you basically have the step goal field.
To build a pointer goal field, on top of selecting three datafields, you can also select a pointer (like an analog hand). Then the pointer will rotate based on the “current” value between “from” and “to” values.
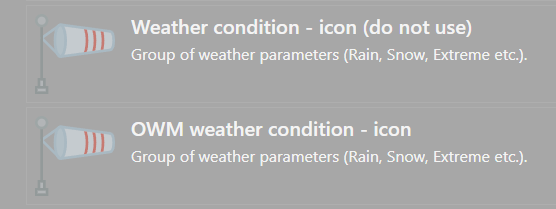
All weather condition has both day and night icons now.
Please replace your “weather condition – icon” field with the new “OWM weather condition – icon”.
Cookie Info
This site uses cookies and other tracking technologies to assist with navigation,
analyse your use of our products, assist with our promotional and marketing efforts,
and provide content from third parties.
By continuing to use the site, you agree to the use of cookies.